Programming with pico-jxglib
pico-jxglib is a set of C/C++ libraries that works along with the Pico SDK.
Below is a quick introduction to set up the Pico SDK:
Quick Setup of Pico SDK
- Install Visual Studio Code (VSCode) from here. It's free and available for Windows, macOS, and Linux.
- Launch VSCode and press
Ctrl+Shift+Pto open the command palette, then typeExtensions: Install Extensionsand select it. - Search
Raspberry Pi Picoin the extensions marketplace and install it.
For more detailed information, please see Getting Started with Pico SDK. It also gives you a quick introduction to Visual Studio Code (VSCode), which is used throughout the documentation here.
Integration with Pico SDK
Making pico-jxglib available in your project is simple: just clone the pico-jxglib repository from GitHub and add a few lines to your CMakeLists.txt.
If you don't have a Pico SDK project yet, create a new one as described below:
Create Pico SDK Project
- In VSCode, run
>Raspberry Pi Pico: New Pico Projectin the command palette. -
In the dialog below, select
C/C++.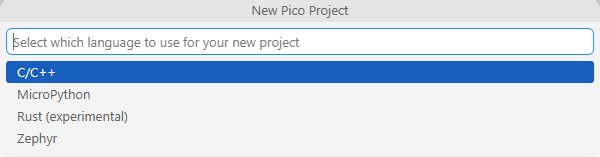
-
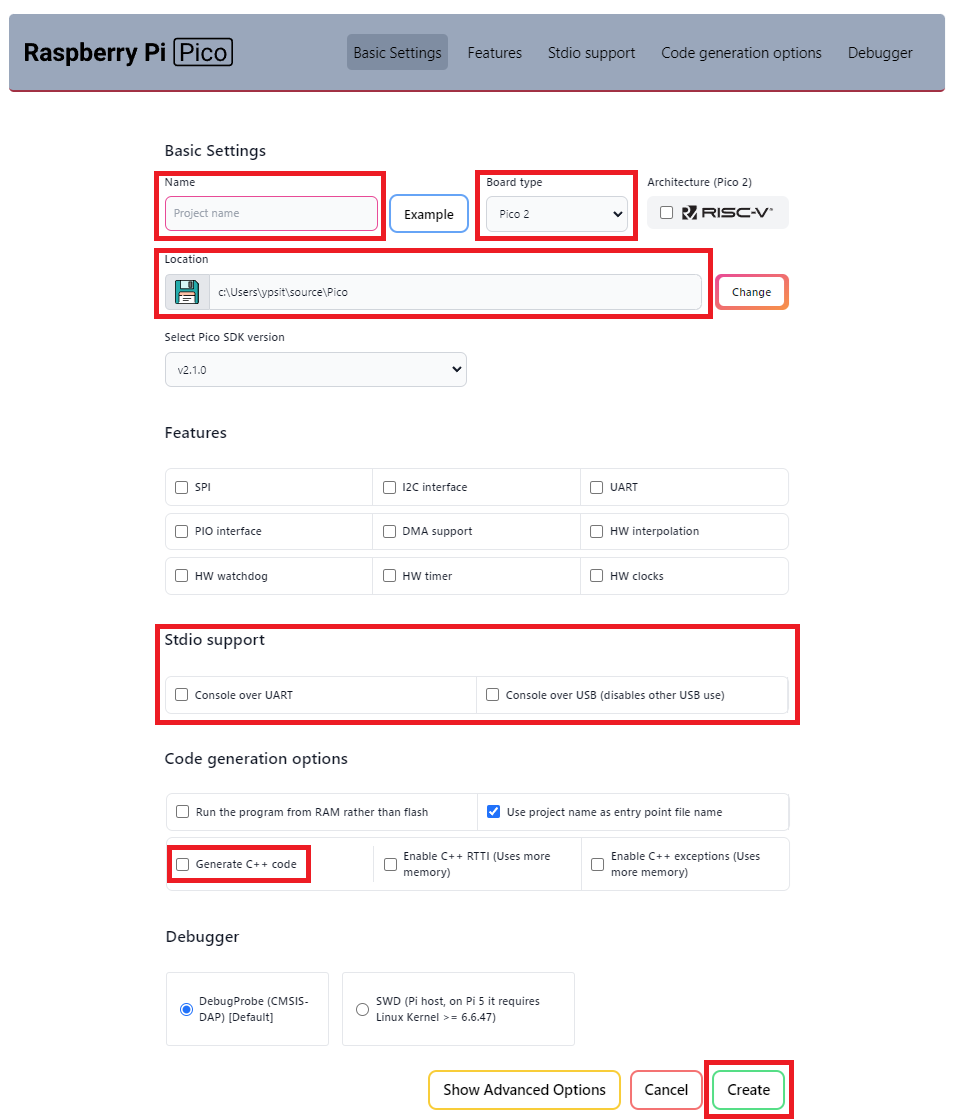
Create a project with the following settings:
- Name ... Enter the project name.
- Board type ... Select your board type.
- Location ... Select the parent directory where the project directory will be created.
- Stdio support ... Leave
Console over USBunchecked when you use LABOPlatform or other USB features because they conflict with each other. You can enable it by editing theCMakeLists.txtfile later. - Code generation options ... Check
Generate C++ code.
Open Existing Pico SDK Project
Open the project folder in VSCode using one of the following methods:
- In a command prompt, change the current directory to the project folder and execute
code .. -
In a Explorer, choose the project folder, push
Alt+Dto focus the address bar, and executecode ..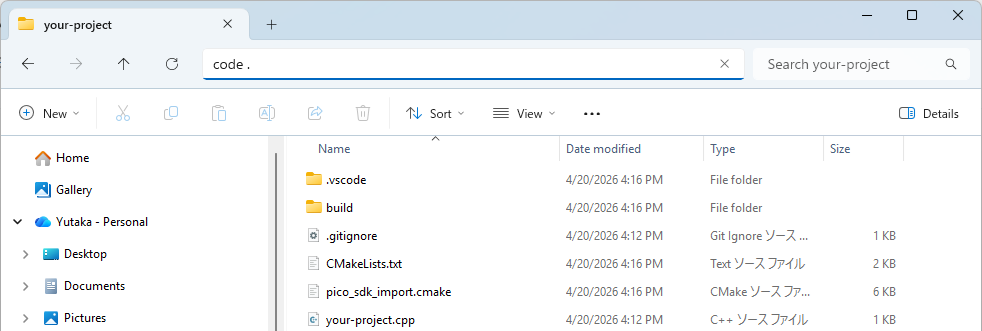
If the folder is already prepared as a Pico SDK project, just proceed with editing and building the project.
If not, you will see the following message at the bottom right corner of VSCode.
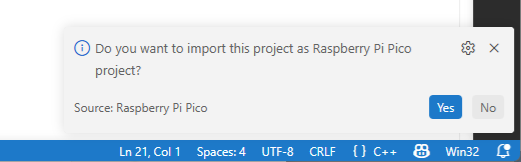
Click Yes and you will see the following window.
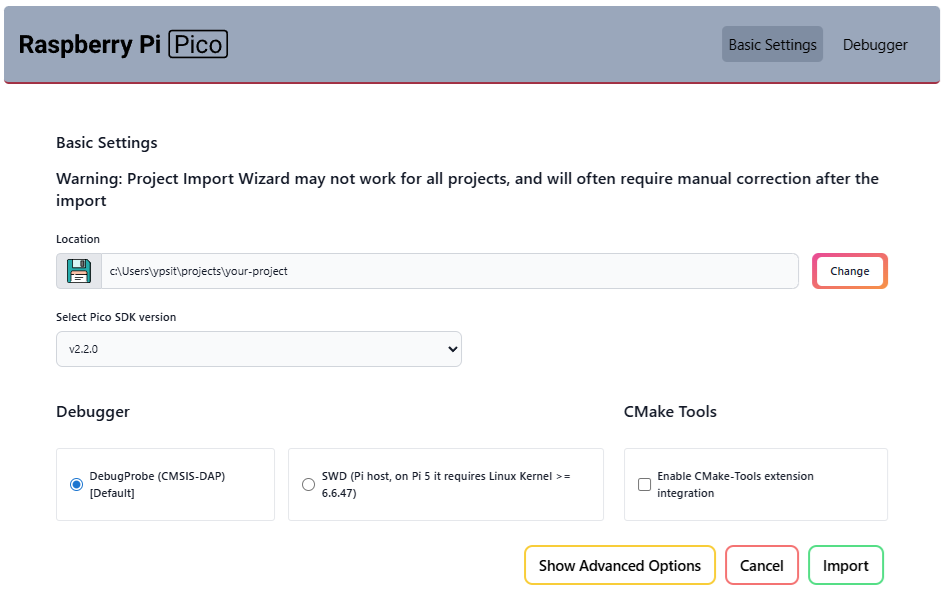
Click Import and the project will be prepared as a Pico SDK project.
When the Do you want to import this project as Raspberry Pi Pico project? message disappears before you click Yes, you can reveal it by clicking the icon  at the bottom right corner of VSCode.
When you create a new project with the name your-project, the project directory will look like this:
Then, clone the pico-jxglib repository from GitHub as follows:
Clone the Repository
Change the current directory to the parent directory where you want to clone the pico-jxglib repository and run the following commands:
$ git clone https://github.com/ypsitau/pico-jxglib.git
$ cd pico-jxglib
$ git submodule update --init --recursive
pico-jxglib is updated almost daily. If you've already cloned it, run the following command in the pico-jxglib directory to get the latest version:
A directory from a Git repository can safely be moved to another location even after cloning.
But, wait. Where should we put the pico-jxglib directory? There are two ways of arranging the directories of your project and pico-jxglib:
Inside Style
pico-jxglib is placed inside your-project directory like this:
In this style, add the following command to your CMakeLists.txt:
This style works well with Git's submodule feature, allowing you to manage pico-jxglib as part of your project repository.
Outside Style
pico-jxglib is placed in the same directory as your-project like this:
In this style, add the following command to your CMakeLists.txt:
Second argument pico-jxglib is required in add_subdirectory() because the added directory contains a reference to a parent directory. The string in the second argument is used as the output directory name for generated files. As long as it doesn't conflict with other directories in build, you can use any name.
This style is useful when you want to share pico-jxglib across multiple projects like follows:
Building Programs with pico-jxglib
Using the project created above, let's create actual programs that use pico-jxglib. There are two sample programs:
- Blinky Program ... The simplest program that blinks an LED connected to a GPIO.
- LABOPlatform Program ... A more complicated program that has the same functionality as pico-jxgLABO, including the interactive shell and built-in logic analyzer.
Modify the CMakeLists.txt and your-project.cpp files as described below. It is assumed that pico-jxglib is placed in the same directory as your-project (outside style).
Add the following lines to the end of CMakeLists.txt:
| CMakeLists.txt | |
|---|---|
Edit your-project.cpp as follows:
Add the following lines to the end of CMakeLists.txt:
| CMakeLists.txt | |
|---|---|
Edit your-project.cpp as follows: